distledge
A sample distributed ledger project using Solidity
Project maintained by parrisma Hosted on GitHub Pages — Theme by mattgraham
Start Test UI
Install Yarn
cd .\frontend
```text
Install [Hardhat](https://www.npmjs.com/package/hardhat)
Install [yarn](https://classic.yarnpkg.com/en/docs/install#windows-stable)
```text
cd ..
Start the Hardhat node
We first need to run up a stand alone Hardhat test network, as below. To do this we must start a new command console and change directory into the project root.
This Hardhat network is set-up according to the details in hardhat.config.js
npx hardhat node
and you should see something as below.
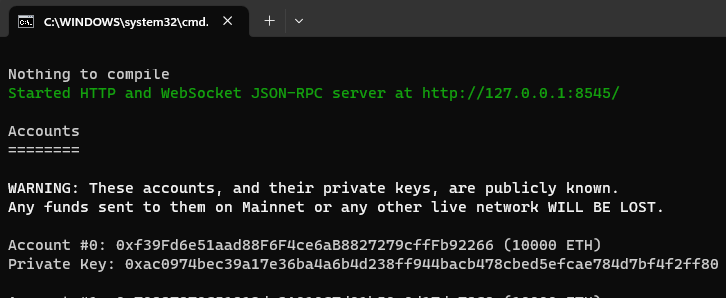
This will start a stand alone node to which we can deploy our test contracts and then connect our UI so that we can interact with those test contracts.
Deploy the Test Contracts
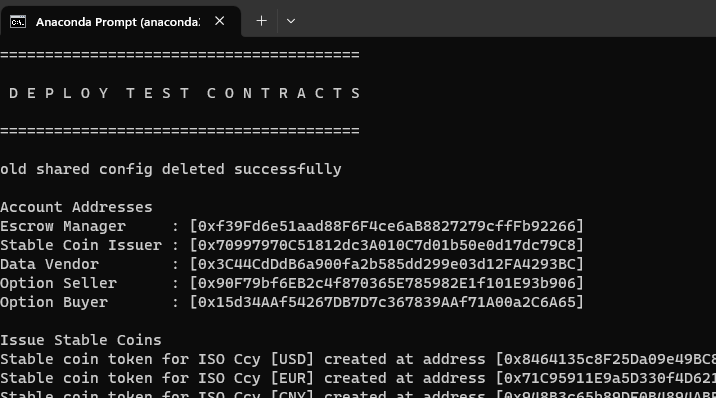
To deploy our test contracts, we run the deploy script as below.
npx hardhat run --network localhost scripts\deploy\deploy.js
When this has run it will have deployed all of the test contracts and exported their details into scripts\tmp\sharedConfig.json. These details can be read by any javascript module using the scripts\lib\sharedConfig.js utility.
You should see something like
note the scripts\tmp\sharedConfig.json file is created every-time the deploy script is run. So you cannot use a stale version of this file to get details of the deployed contracts.
Install MetaMask
If you don’t have Metamask and a Metamask account you will need to install it and create and account.
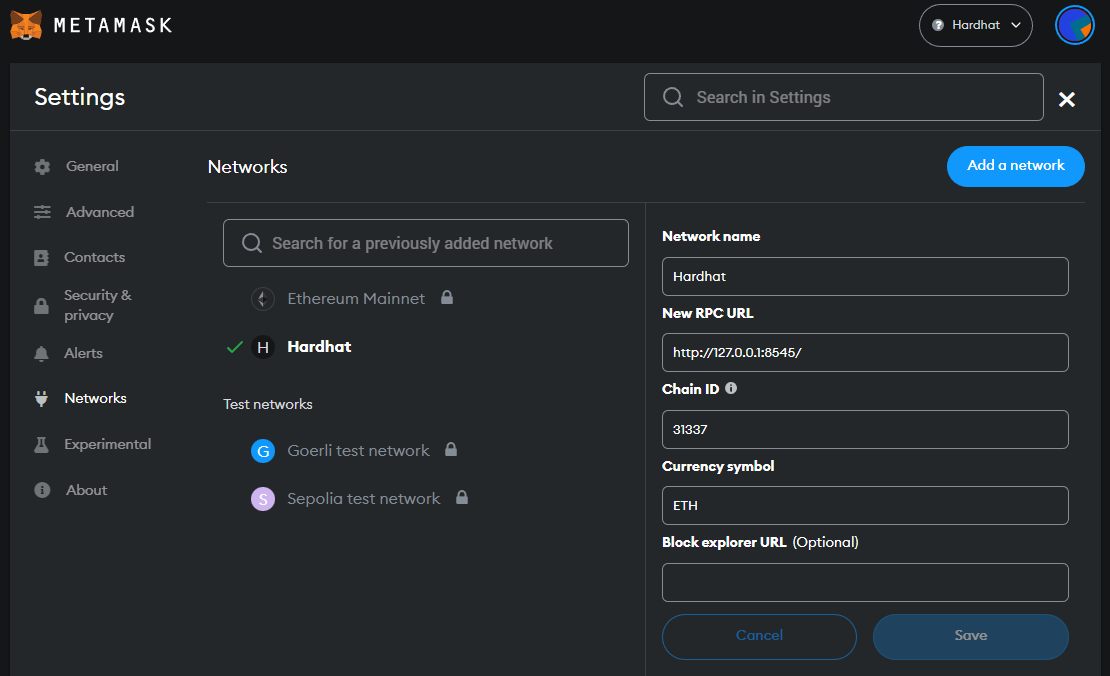
Connect MetaMask to Hardhat Test network
The UI will interact with the Hardhat network via MataMask. So you will need to connect Metamask to the Hardhat network that is running and that has the test contracts deployed to it.
You will find the RPC URL as the first line in the console from which the Hardhat test node was started and the chain ID in the hardhat.config.js in the root of the project.
The network name Hardhat, is free text as a name for these settings, however as these settings connect to the local hardhat network, Hardhat seems like a fitting name.
Import the Test accounts from the Hardhat Test network
You will need to import the test accounts from the hardhat test network started above. You will need the private keys of the accounts shown in the console when the network was started.
1. Click on Account Icon and select Import
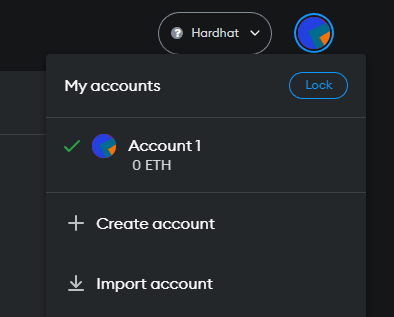
2. Copy and paste one of the private keys
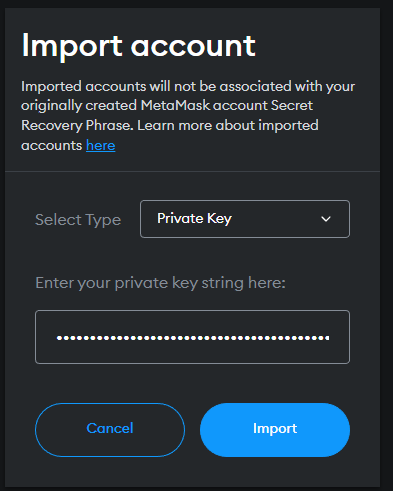
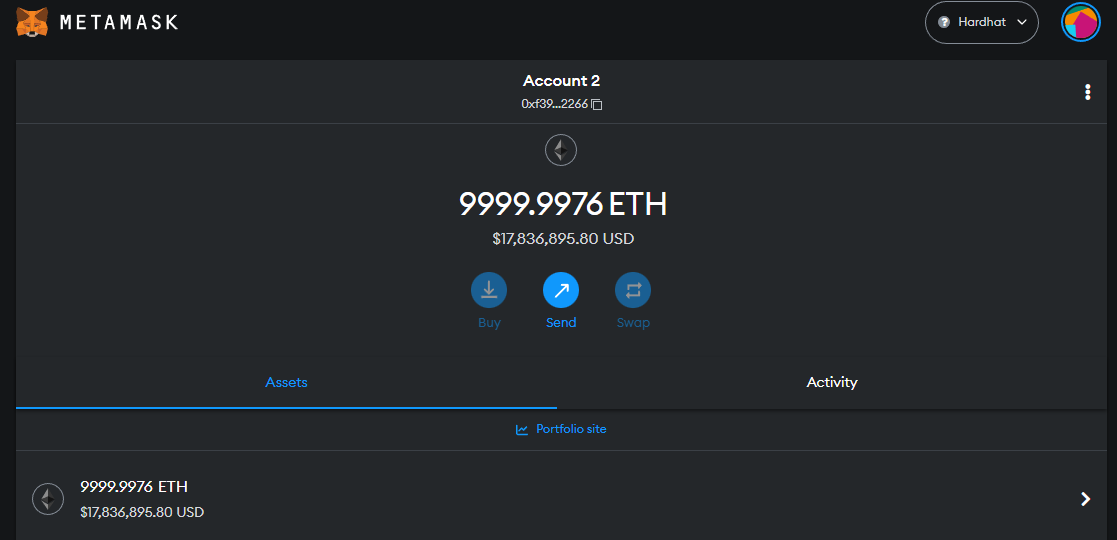
3. Hit import and you will see the account screen
Export abi and contract address
The UI needs to know about the contracts that have been deployed to the test network. So the command below make the deployment addresses and abi files available to the UI.
yarn hardhat run ./scripts/exportToFrontEnd/updateFrontEnd.js --network localhost
Run Web Service
The ERC721 Option NFT Contracts are supported by a local Web Service that manages storage of the Option terms.
from the project root, run the command below to export all deployed addresses, such that WebServer can see them.
yarn hardhat run ./scripts/exportToWebService/updateWebService.js --network localhost
To run the WebServer …
cd ./webserver
npx hardhat run --network localhost server.js
You should then see the message below to indicate where the Web Service has started, the setting are controlled by ./webserver/serverConfig.js
Server Listening on [http://localhost:8191]
Update Front End Components
cd ./frontend/
npm install
Run UI
npm run dev
Using the Front-end
- In Chrome navigate to http://localhost:3000/
- right click
inspectto open up the developer window so you can see the console output and other in browser debugging support while developing the UI - Hit the connect wallet button and login to your Metamask or other wallet service
- You should see the Equity price update and you are off an running.
Debugging the Front-end
- Run UI by following instructions above.
- Open VSCode with ./frontend/ as root directory.
- Choose debug configuration “attach debugger in front end” and Press F5
- Set your breakpoint in the frontend component.
- Access weg page http://localhost:3000 in chrome
- Your breakpoints are hit and execution is paused.